A Highland Photo Trip: Part 6 Kylesku to Drumbeg
 |
| The Quinag Ridge from Loch a Chairn Bhain with Sail Gharbh on left and Sail Ghorm on right Fujifilm X-T2 + XF16-55mm f2.8 - 60s @ f18 ISO200 (zoom16mm) - Point A on the map below |
We patiently waited for the clouds to break and the 1-minute exposure used to capture the image at the top of the page gives a sense of the dramatic light that was unfolding in front of us.
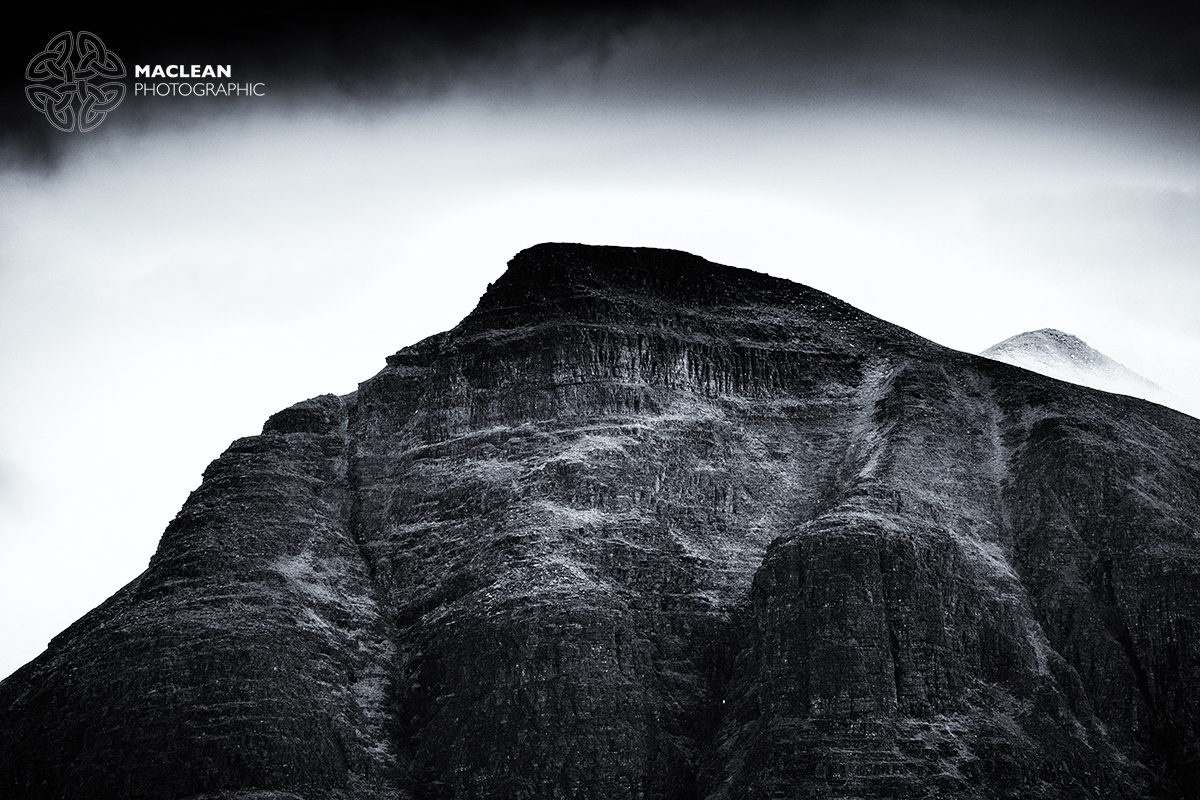 |
| Sail Gharbh (808m) - Fujifilm X-Pro2 + XF100-400mm f4.5/5.6 - 1/500 @ f5.6 ISO400 (zoom 235mm) - Point A on map |
 |
| Cloud cover on Spidean Coinich from the bridge spanning the Allt na Bradhan Fujifilm X-T2 + XF10-24mm f4 - 1/4 @ f14 ISO200 (zoom 12mm) - Point B on the map below |
 |
| Cloud cover on Spidean Coinich, mirrored in the Allt na Bradhan Fujifilm X-T2 + XF10-24mm f4 - 1/8 @ f14 ISO200 (zoom 10mm) - Point B on the map below |
 |
| Derelict Croft at Drumbeg - Fujifilm X-T2 + XF10-24mm f4 - 1/25 @ f8 ISO200 (zoom 10mm) |
 |
| Derelict Croft at Drumbeg - Fujifilm X-T2 + XF16-55mm f2.8 - 1/400 @ f3.6 ISO200 (zoom 55mm) |
 |
| Derelict Croft at Drumbeg - Fujifilm X-T2 + XF16-55mm f2.8 - 1/125 @ f3.6 ISO200 (zoom 48mm) |
When we reached Drumbeg we stopped in a car park over looking the coast but my eye was drawn to a ruined croft that would provide the perfect foreground subject as the weather was closing in once again.

The last part of the trip will be posted tomorrow with stops to capture the beach at Clashnessie and then back up into the mountains. We finally ended up on the coast at Altandhu for the sunset that we had been waiting for for two days.
Other features from this trip
A Highland Photo Trip: Part 8 Sunset at Altandhu - CLICK HERE
A Highland Photo Trip: Part 7 Clashnessie Beach to the River Polly - CLICK HERE
A Highland Photo Trip: Part 5 Ardvreck Castle - CLICK HERE
A Highland Photo Trip: Part 4 Bealach na Ba to Applecross - CLICK HERE
A Highland Photo Trip: Part 3 Lochcarron to Loch Kishorn - CLICK HERE
A Highland Photo Trip: Part 2 Inverness - CLICK HERE
A Highland Photo Trip: Part 1 Ruthven Barracks - CLICK HERE
-------------------------------------------------------------------------------------------------------------
MacLean Photographic run Tours and Workshops in East Lothian and the Borders of Scotland. CLICK HERE for more details and availability


Jeff Carter is an Official Fujifilm X Photographer and was named as a Fujifilm brand ambassador in June 2015. In 2016 he worked with the company on the launches of the Fujifilm X-Pro2 in Tokyo and the Fujifilm X-T2 in Paris in July 2016. You can view his profile and gallery on the Fujifilm website HERE
Comments
Post a Comment